Setting up the integration
In this section, you should follow the steps to configure the Bryq Security Account profile and custom fields to ensure the integration is operational.
Step 1: Company Configuration
-
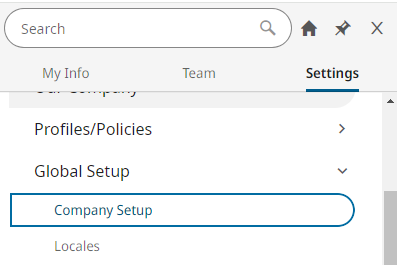
Log into UKG Ready and go to Settings > Global Setup > Company Setup > Company Config.
-
Get the Company Short Name from the URL, for example

2. Log into UKG Ready and go to Global Setup > Company Setup > Company Config.
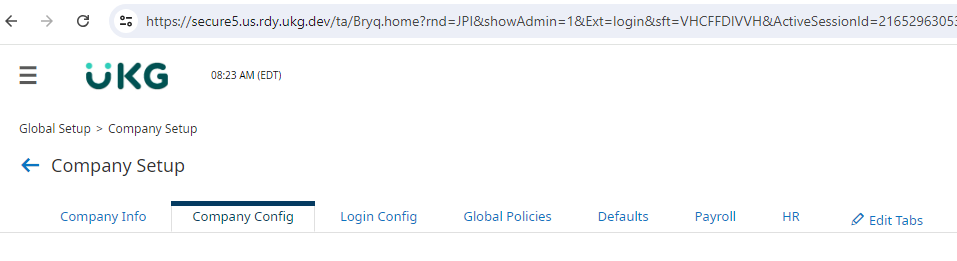
3. Retrieve the domain part of the URL, for example
https://secure5.us.rdy.ukg.dev/ta/Bryq.home?rnd=XIE in this case it is https://secure5.us.rdy.ukg.dev.
Step 2: Create the Bryq Security Profile
-
Log into UKG Ready and go to Settings > Profiles/Policies > Security.
-
Click Add Security Profile
-
Type the name Bryq
And enable the following permissions:


Click Save.
The Bryq profile is now displayed in your Company Security Profiles table.

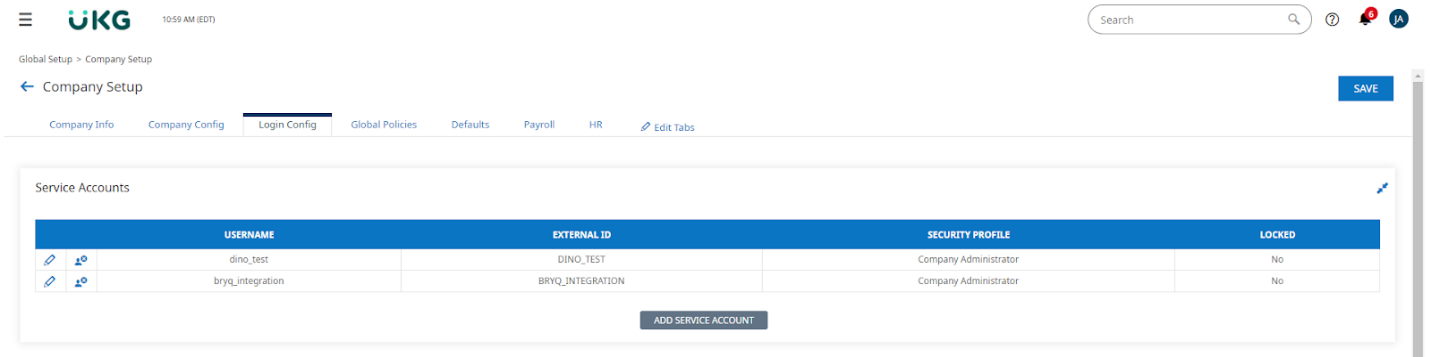
Step 3: Generate Login Credentials
-
Log into UKG Ready and go to Global Setup > Company Setup > Login Config.
-
Go to Edit Tabs and select Login Config from My Tabs on the left.
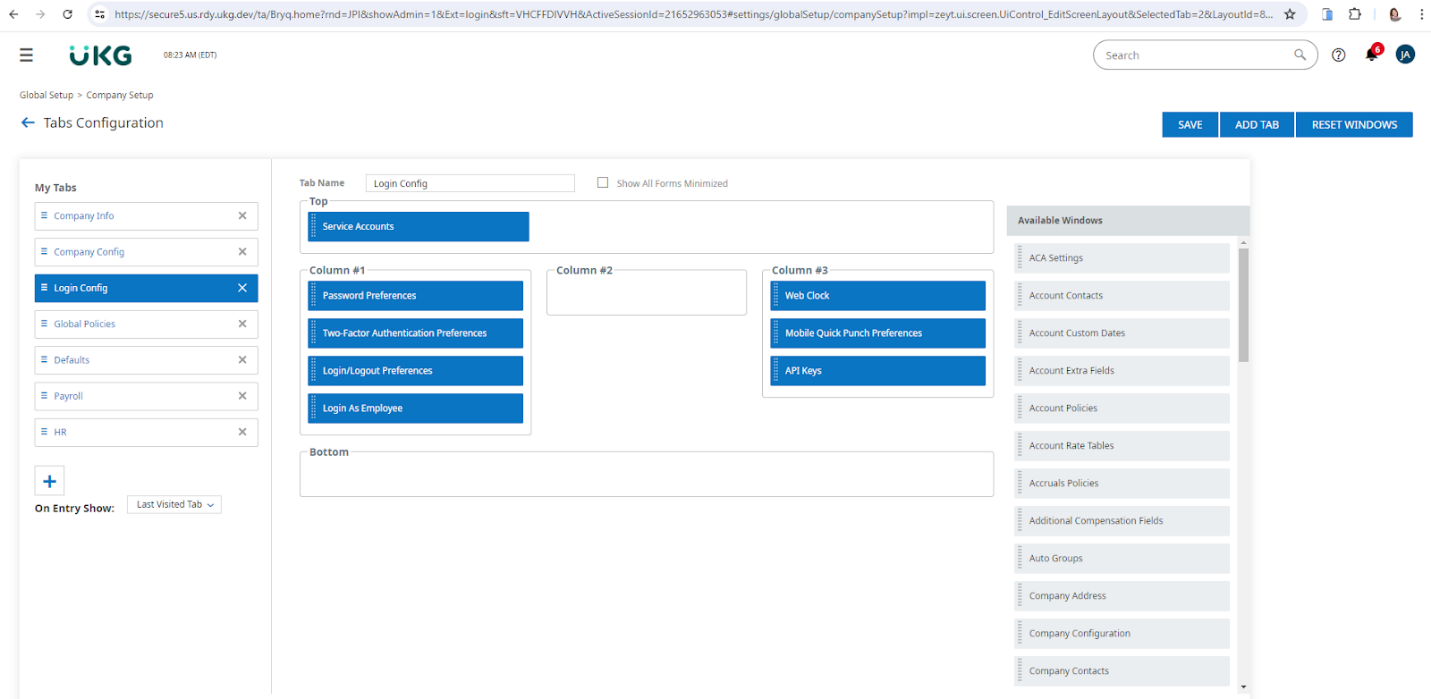
3. From Available Windows, retrieve the Service Accounts box and drag it to the Top container.
4. You should now see Service Accounts under the Login Config tab.

API Key
-
Find the API Keys section at the bottom.
-
Click GENERATE.
-
Click Yes.
📌 Make a note of the API Key generated to pass it to Bryq.

Username & Password
-
Log into UKG Ready and go to Global Setup > Company Setup > Login Config.
-
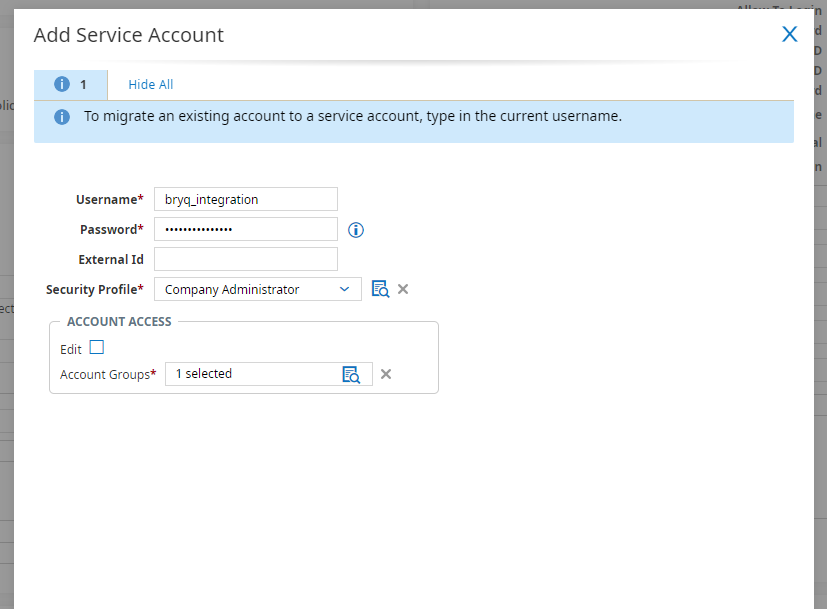
In the top Service Accounts container, click ADD SERVICE ACCOUNT.
-
Enter the below information:
Username: bryq_integration
Password: Choose a strong password, and 📌 make a note of it to pass it to Bryq.
4. Select the Security Profile: Bryq
ACCOUNT ACCESS: Select the group you want to give access to Bryq to. This is usually All Company Employers, or the HR department.
Your service account is configured.
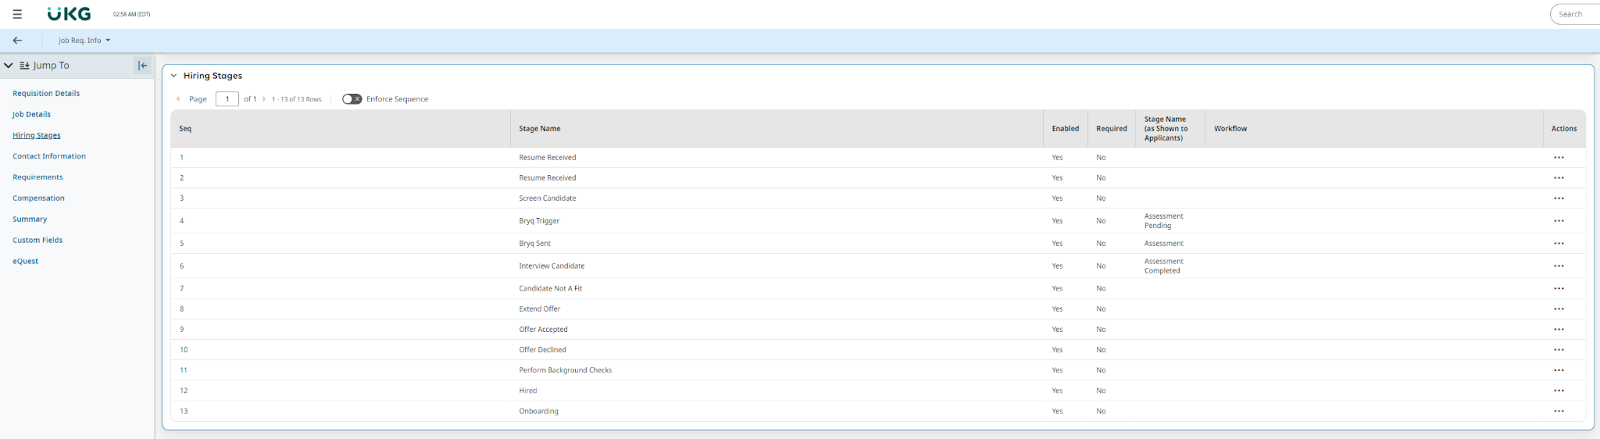
Step 4: Stage IDs
Go to HR Setup > Applicant Tracking/Recruitment > Hiring Stages
Trigger stage Id
This is the stage at which a Bryq assessment will be triggered for an applicant.
Create a new stage, or choose an existing one by clicking the pencil (edit) icon on the left. Copy the URL in your browser window, and make a note of the StageId there. For example, in this case:
|
The StageId is 17123200.
📌Make a note of this to pass it to Bryq. |
Sent stage Id
This is the stage an applicant will be moved to after they are sent a Bryq assessment.
Create a new stage, or choose an existing one, and following the process above,
📌 make a note of the StageId.
Completion stage Id
This is an optional stage that an applicant can be moved to once they complete their Bryq assessment.
If you would like to make use of this feature, then follow the process above and
📌 make not of the StageId.
💡In our user guide, we assume the transition step following assessment completion is Interview Candidate.
💡We also recommend using a Stage Name (as Shown to Applicants) to provide candidates with clear and user-friendly transparency during the application process.
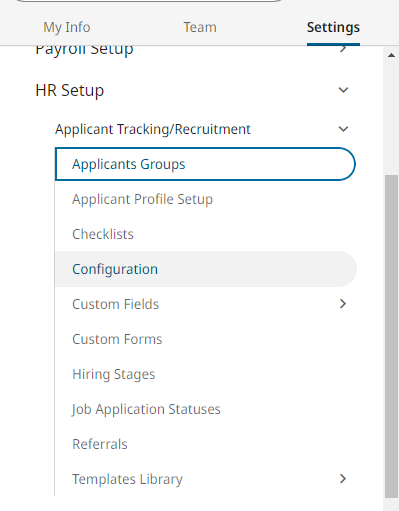
Step 5: Custom applicant field indexes
In order for Bryq to send assessment results back to UKG Ready, 4 custom applicant fields need to be added.
Go to HR Setup > Applicant Tracking/Recruitment > Custom Fields > Applicant Custom Fields
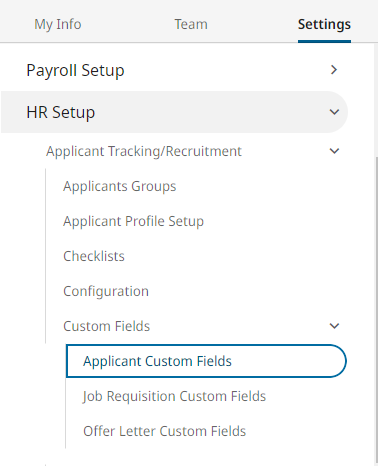
Add the following fields:
|
Label |
Type |
Is Required |
|
Bryq Score |
Numeric |
N |
|
Bryq Fit Score |
Characters (maximum length 4000) |
N |
|
Bryq Report URL |
Link (maximum length 4000) |
N |
|
Bryq Report |
Text Area (maximum length 4000) |
N |
📌Make a note of the Email Tag Name of each field, for example, APPLICANT_CUSTOM_FIELD_1 or APPLICANT_CUSTOM_FIELD_2, to pass to Bryq.
Bear in mind that the indexes in the API start from 0. In this case: APPLICANT_CUSTOM_FIELD_1 = 0 etc.

Once the configurations are passed on to Bryq and the integration is established then the Recruiter can start creating requisitions and assess them via the Bryq assessment.
Sending Bryq assessment and viewing results
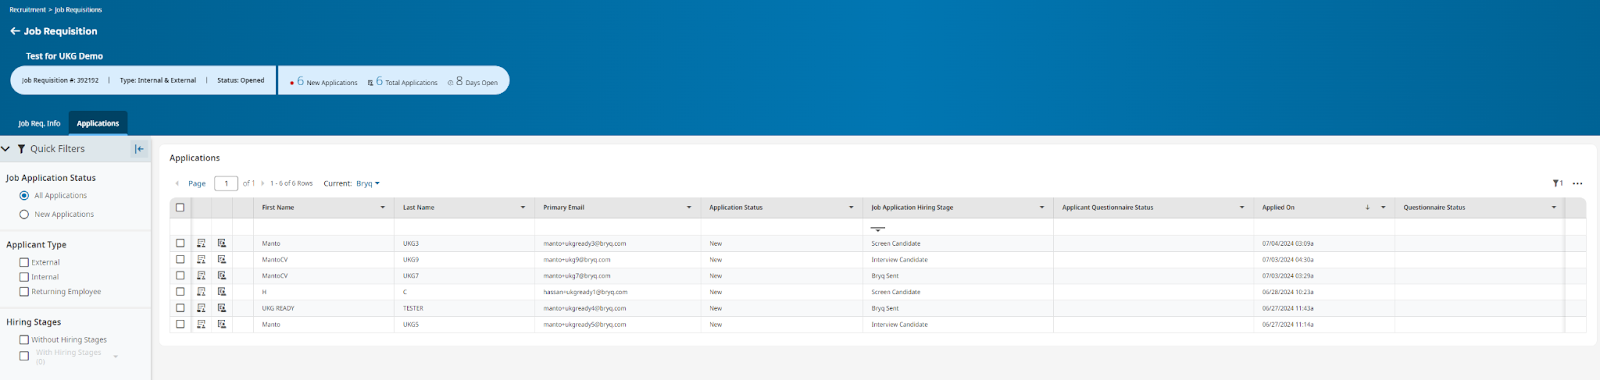
Once the recruiter creates a new Job Requisition they need to verify that the Hiring Stages contain the stages that relate to the Bryq assessment as seen below. Then, they can save the requisition.
Then the Recruiter can either add a candidate directly in UKG Ready or a candidate can apply via the Career Portal under My Jobs Portal > Find Jobs.
Upon submission of the application, the recruiter will be able to view the candidate under the Applications tab of the Requisition in UKG Ready.
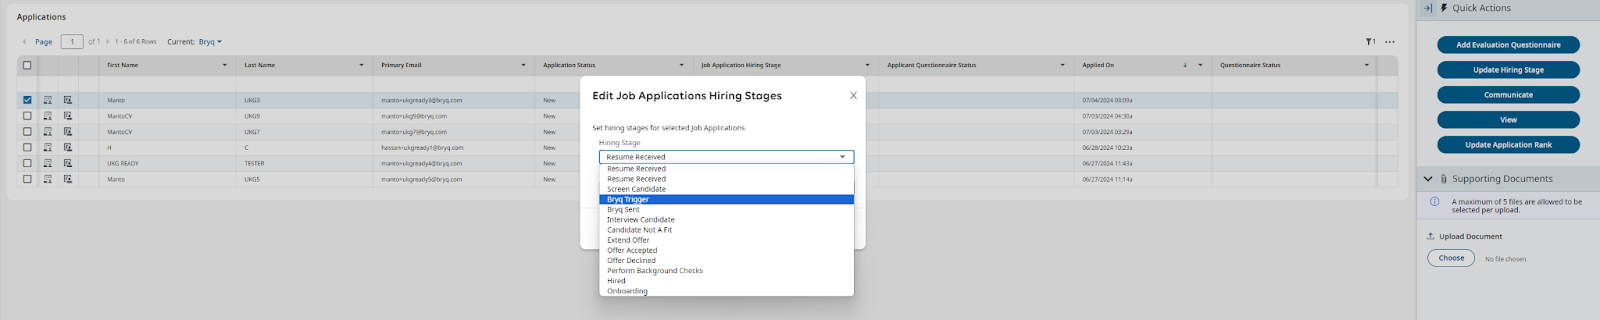
Select the applicant and update the Hiring Stage to Bryq Trigger as seen below:
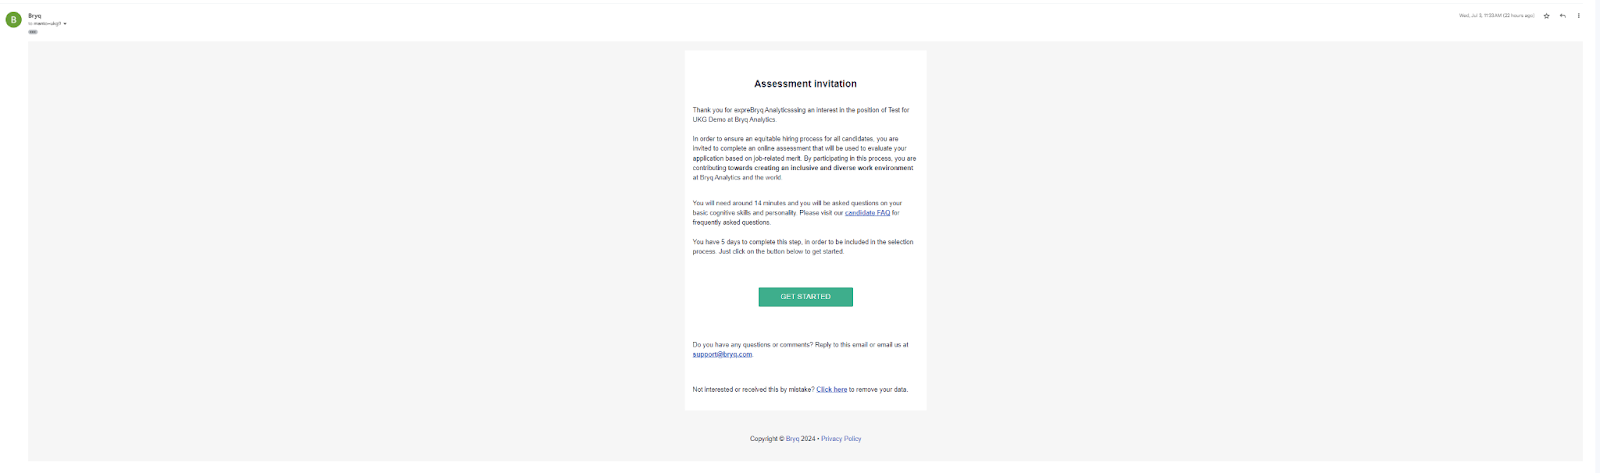
Then the candidate will receive an invitation to take the assessment.
📌In case a candidate has already taken an assessment, they will not need to re-take it. Their results are populated for the candidate instantly.
The candidate takes the assessment and completes it. While the assessment status is pending (i.e., not completed), the candidate's hiring stage is automatically updated to "Bryq Sent" following the assessment invitation.

The candidate receives an email with their results.
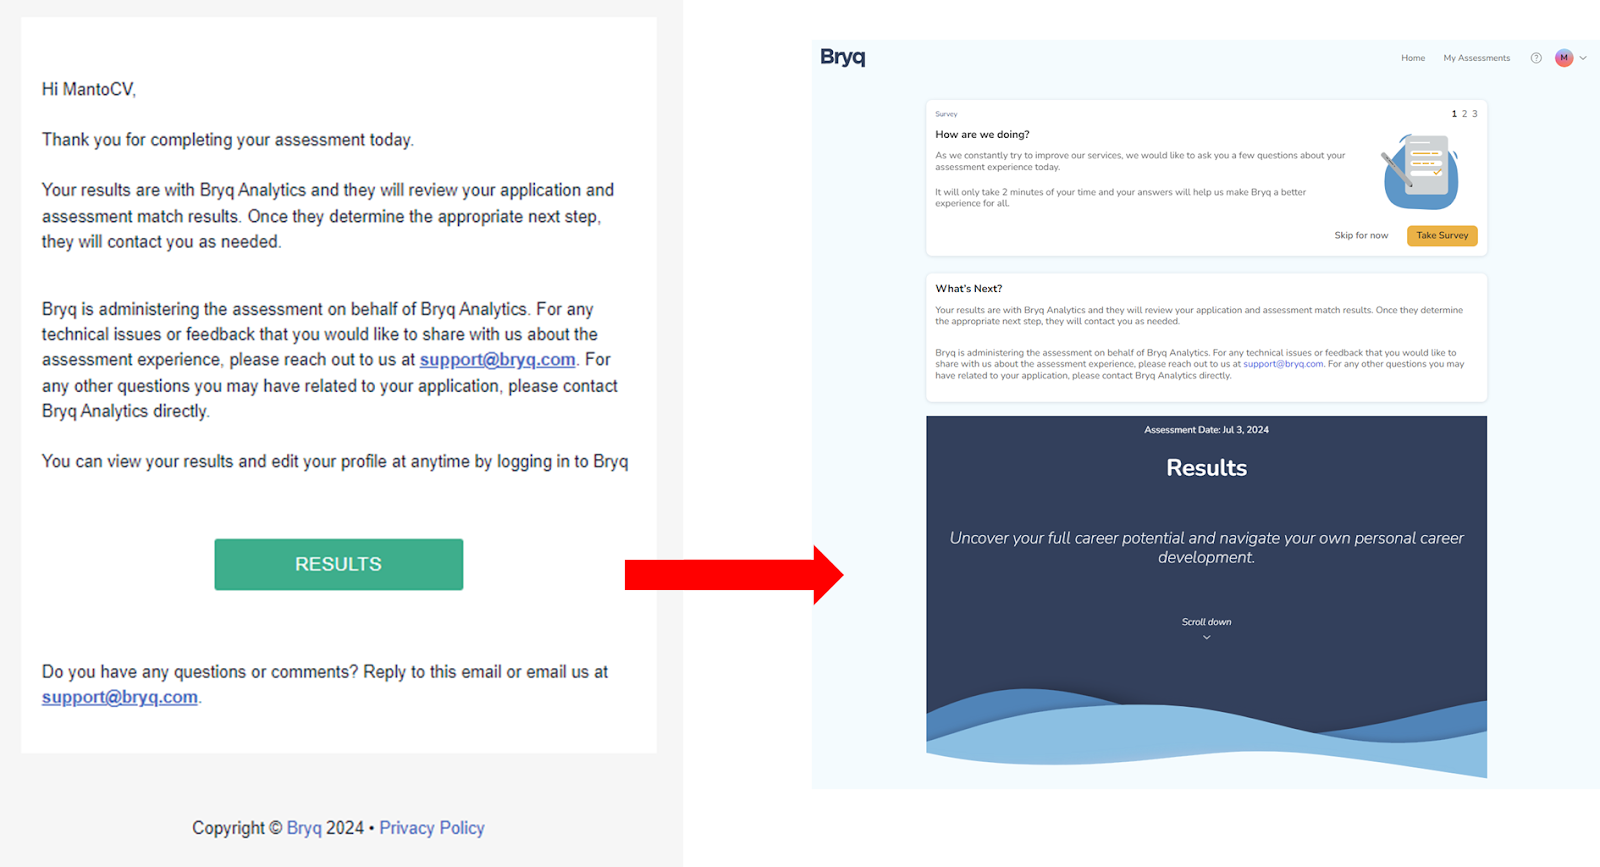
The candidate hiring stage automatically moves to the designated i.e. in our guide Interview Candidate. The Recruiter can view candidate results by clicking on the relevant candidate under the Main tab.

There the following data are shown under Custom Fields:
-
Bryq Score: the % score.
-
Fit Score: recommendation of the candidate's potential for the role.
-
Anonymized link: with the candidate’s results as displayed in Bryq.
-
Report: All candidate scores relevant to the role i.e. skills, cognitive abilities and personality traits.
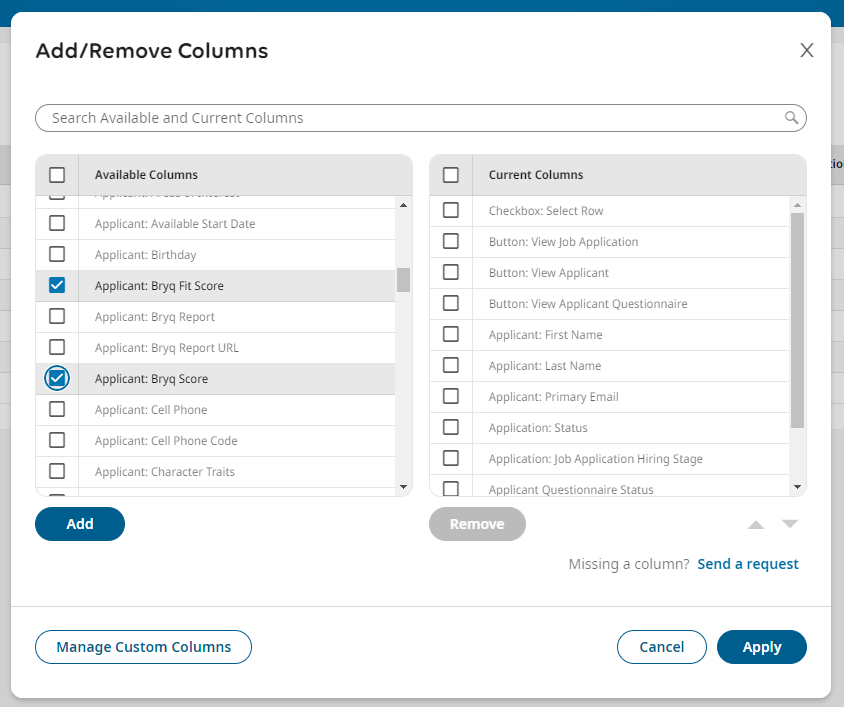
💡To enhance your table view, we recommend including both the Bryq Score and Fit Score. This will provide you with immediate access to candidates' evaluation results. Click on the three dots icon on the top right of your Applications table and select Add/Remove Columns. Navigate to the column Applicant: Bryq Score and Applicant: Bryq Fit Score, then, click Add. You may also change the columns' order and once ready click Apply.
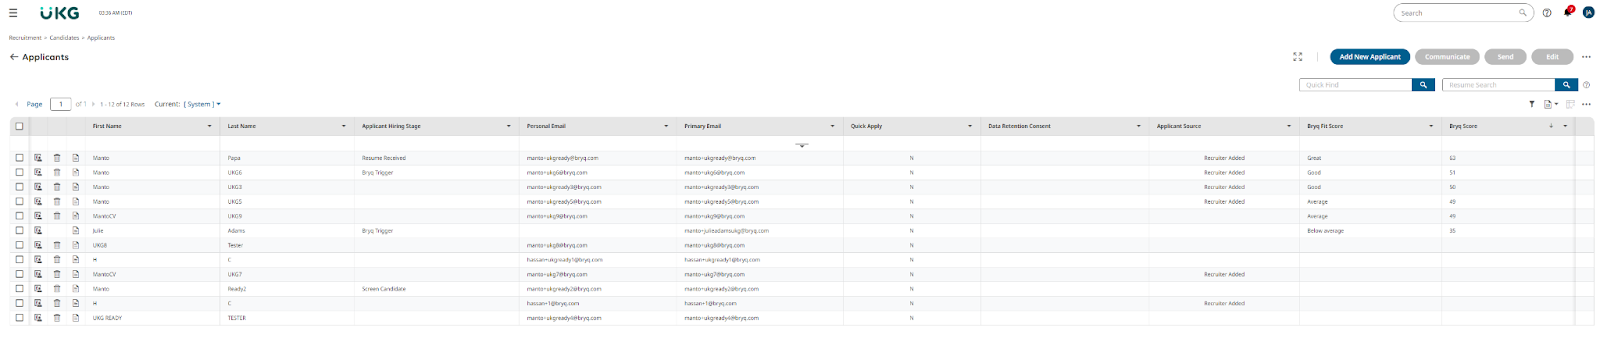
Now, you can quickly scan candidates as per their Score and Fit Score for the relevant role.

📌The same view is also useful to apply in your Candidates table under Recruitment > Candidates > Applicants.
Happy Hiring!💫